Kombucha is a fermented drink that includes beneficial bacteria and yeasts for your digestive health! (Yep, I’m still working on my gut flora – LOL).
The gut is ground zero for autoimmune disorders and is the seat of our immune system. How well we digest our food, how much of the nutrients from our food get absorbed, and many other important things for optimal health are dictated by the health of our gut.
So – I decided to add Kombucha into my diet. I would buy a bottle here and there, sometimes I liked the flavor, other times I felt it had fermented too long and didn’t taste so good anymore! One of them I had purchased literally tasted like beer! (I don’t personally like the flavor of beer, so for me this wasn’t a good thing). Since you can never be truly sure how the flavor will come out when you open a store-bought bottle, I decided to make my own.
I seem to have issues with Camellia sinensis, which is the botanical name for the plant used to make Oolong, Black Tea, Green Tea, White Tea and Pu’erh teas. So, while the majority of Kombucha recipes you find online tell you to brew a black, green, white or oolong tea to make your Kombucha, this isn’t an option for me.
The reasoning behind the tea, other than flavor, is that it is slightly acidic. This can help avoid the growth of bacteria or yeasts you don’t want to have in your drink. In place of the tea, I used a little extra Apple Cider Vinegar.
Kombucha Made Easy
First, I needed a SCOBY. SCOBY stands for Symbiotic Culture of Bacteria and Yeast. They look like a flat whitish colored jellyfish type substance with little stringers coming off the bottom of them and can also be referred to as “the Mother”.
So, I took the bottle of Kombucha I had purchased that tasted more like beer and put it into a glass canning jar. I dissolved about 1/4 cup honey in a cup or two of water and once that was at room temperature I put it into the glass canning jar (gotta feed the SCOBY and they like to eat sugars!). I then secured a paper towel with a rubberband to the top of the jar (SCOBY needs to breathe, plus they can create a carbonation effect in your drink which can build up enough force to break the glass, so don’t seal it off). After a week I had a nice small SCOBY! YAY!
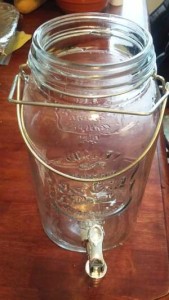
Now that I had a SCOBY, I wanted a bigger jar that had a spout at the bottom so I don’t have to disturb my SCOBY whenever I want a drink.
It turned out to be a gallon jar, so I put 6 cups of filtered water and one cup of honey in a big pot and started dissolving the honey into the water.
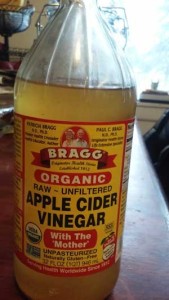
I then rinsed out the new jar with water, and took apple cider vinegar and splashed it around all over the inside of the jar. You don’t want to clean anything with soap that you are using for brewing your Kombucha as the soap could kill the very microorganisms you’re trying to breed! Once it was well rinsed, I put 2 cups of apple cider vinegar into the jar. I prefer to use Bragg’s because it contains “the Mother” which helps the SCOBY to grow.
Once my honey was dissolved into the water, and allowed to cool to room temperature, I poured it all into the big jar.
I then added 2 more cups of filtered water
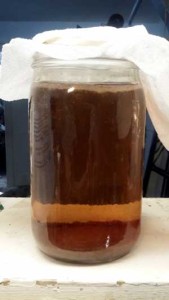
I rinsed my hands well with Apple Cider Vinegar, and took down my little jar, removed the paper towel, and carefully lifted out the little SCOBY that had been growing on top. I used a spoon to scoop out some of the liquid and double check flavor (being the original product tasted like beer) and to my surprise it was much better. So I poured the liquid from the small jar into the big jar and then gently set the SCOBY on top. It looks tiny in its new home!
I added the paper towel held on with a rubber band and placed the new jar of Kombucha in its permanent home. All done! Now I wait a week and see if it’s ready to drink!
Kombucha Tips
- Kombucha done this way, without tea, should taste similar to a sweet vinegar. It is good to taste test it regularly as it does eat the sugars from the honey. If it is tasting too strongly of vinegar for your liking, make some more honey water to add. If it is too sweet, add more apple cider vinegar, or let it sit longer to eat the sugars.
- Your SCOBY is a living organism. It cannot handle direct sunlight, being sealed away from air, or soap on your hands or utensils you are using in its home. It cannot handle extreme heat or cold temperatures, so make sure you bring your dissolved honey water to room temperature before adding it to your jar, and don’t brew it in the refrigerator. Heat can damage and kill the beneficial microorganisms. Cold puts them into a dormant state but they will wake up and get active again once they warm back up.
- Your SCOBY may decide to float at the top of your jar, or somewhere in the middle, or even hang out down at the bottom of the jar. These are all perfectly acceptable locations for your SCOBY to be.
- Your SCOBY can be white or off white/gray, but if it starts going black or green and smelling “off” then it very well might be time to get a new SCOBY as it might have been contaminated with something that is not beneficial for you!
Enjoying Your Kombucha
OK – so you’ve made this lovely drink of living organisms sitting beautifully on your counter top.
Now what?
- Since we didn’t use any tea, our Kombucha isn’t already flavored.
- And since we used a jar with a spout, we do not need to disturb our SCOBY to drink some!
These are both beneficial, because now you can get any drink you want (provided it isn’t piping hot as that will kill the beneficial microorganisms) and add some Kombucha from the tap right to your drink! Try different juices and cold teas
Want more “carbonation” in your drink?
- Put your juice and Kombucha into a glass bottle with a tight fitting lid.
- Keep it at room temperature (the warmer the temperature the faster the process works, so summertime will be a much shorter brew than winter) and wait. Sometimes a few hours is enough, other times you might want a week.
- You can bottle a bunch at one time this way and once it hits the right level of carbonation put it in the refrigerator to keep it from carbonating further.
Be careful though, because the pressure builds as the carbonation grows, and can actually explode the bottle! Some people like to have a plastic tester bottle on the counter next to their glass bottled Kombucha. Once the plastic bottle feels like the pressure has built up enough (it gets more firm due to the pressure) you know it’s time to put your glass bottles in the fridge.
TIP: use a thicker glass for your Kombucha bottles so it can hold up to more pressure. I use the bottles from my store bought Kombucha, rinse them well with water and apple cider vinegar, and they’re ready for re-use!
Happy Brewing!
Do you have a favorite recipe for your Kombucha? Please feel free to share!


